Showing posts with label Proudly CASE'd. Show all posts

08 February 2008

Embrace Life


TGIF to you!! Yeah! The end of the week is finally here ~ do you just have some weeks like that? They seem to last forever? This week has been one of those weeks for me! I'm looking forward to a few days to just hang around the house, even though I must spend time on getting our tax paperwork ready for our appointment this coming week!!

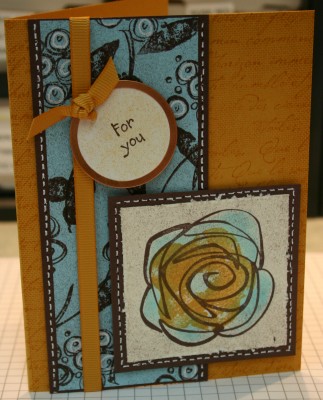
Here is a card that I demo'd this past week -- I love the way it turned out! Special thanks to SCS'er MCCFipps's for her inspiration on this card - I just love the knots in the middle of each flower!

I chose my color combo from my beloved SU! Color Coach -

For the knots for the middle of the flowers ~ I just took a short piece of ribbon and tied a knot in the middle and then just thread both ends of the ribbon thru the hole that I had punched in the middle of the flower. Then I just secured each end to the back of the flower with some SNAIL adhesive and used two stampin' dimensionals to attach the flower to my green stamped background.

As always, here is the recipe:
Stamp Sets: Embrace Life, Canvas Background
Card Stock: From the Color Coach – Cameo Coral, Certainly Celery, Garden Green, Naturals Ivory
Stampin’ Pads: Chocolate Chip, Certainly Celery, Rose Red
Accessories: Bravo Burgundy Wide 5/8” grosgrain ribbon, Stampin’ Dimensionals, 1/8” Circle Punch, ¼” White Grosgrain Ribbon, ¼” Vanilla Grosgrain Ribbon, 1/4” Bravo Burgundy Grosgrain Ribbon


Have a great weekend!!

~TFL & Enjoy~

25 December 2007

Christmas Joy


The card on the left is one I received a few years ago from Sista Mike (missmike) for Christmas. I have loved it since the day I received it!! I had it hanging on my inspiration board in my creative space the past few years and decided I was going to CASE it this year for our Christmas cards!! The card on the right is my case ~

I started with certainly celery as my base. I used CC ink and stamped the Flannel Plaid background. Then I used VersaMark to stamp the snowflakes and embossed them using the now retired Holigram Highlights EP. It really does give it a neat shimmer that does not show up too well in this picture!

Once that was done I started on the 'christmas joy' message. I just loved how Sista Mike did hers but I didnt have an ornament so that is why I decided to use the snowflake again for the 'o' in Joy. I stamped it in order ~ J - O - Y so I could get it spaced correctly. The J and Y are stamped in Real Red using the Big Deal Alpha. The snowflake is stamped in Certainly Celery ink. I then used some funky green glitter glue that Sista Mike recently sent to me! I dabbed that on the 6 tips of the snowflake. It really does add more shimmer to the card even tho you really can't see that in this picture either!! Then I stamped 'christmas' from Everyday Flexible Phrases using Basic Black ink next to the J.

Now it was time to add some ribbon and stuff!! lol I punched out a real red 1/2" circle and taped that to the front of my card. I then punched a 1/8" circle thru those two layers and added a eyelet to the middle. I then ran the silver elastic cord thru the hole and wrapped some assorted SU! ribbons with that and tied a knot. Whoola!

These were fun to make ~ thanks to Sista Mikes inspiration!!

Here is the recipe:
Stamps: The Snowflake Spot, Flannel Plaid, Big Deal Alphabet, Everyday Flexible Phrases
Paper: Certainly Celery, Real Red, Whisper White
Ink: Real Red, Certainly Celery, Basic Black, VersaMark
Accessories: HH Embossing Powder (retired 2007), eyelets, 1/8" circle punch, 1/2" circle punch, assorted SU! ribbons, green glitter glue stuff (on the joy snowflake)

~Enjoy & TFL~

19 October 2007

"Clink"


Once again ~ my idol Sista Mike has inspired me!! I CASED Sista Mike and made this into a wedding card for my cousin who got married!! Its hard to see but the little tag with the glasses on it I filled them in with dazzling diamonds!

Here is a list of my ingredients:

Stamps: Along the Same Lines, Simply Circles
Paper: All from the Color Coach; Bravo Burgundy, Handsome Hunter, Apricot Appeal, Mellow Moss
Ink: Basic Black, Copper Encore, Silver Encore, Gold Encore
Accessories: Dazzling Diamonds & 2 way glue pen (for inside the bottom half of the glasses), Gold Eyelet, Crafters Tool Kit, Narrow Gold Organdy Ribbon, Gold Cord

~Enjoy & TFL~

27 September 2007

Thanks Tri-Fold

This is a tri-fold card - see the little tab? Flip that up and open up the two flaps!! FUN!!!

Thanks once again to Sista Mike - 'missmike' - for the inspiration!

Here is a list of ingredients I used:
Stamps: Best Blossoms, Alphabet Soup, Itty Bitty Backgrounds
Paper: From the Color Coach; Always Artichoke, Elegant Eggplant, Rose Red, Confetti Cream
Ink: Versa Mark, Elegant Eggplant, Rose Red
Accessories: Sponge, Window Word Punch, 1/16" circle punch, Vintage Brads, Blue Grosgrain Ribbon, Olive Narrow Organdy Ribbon, Black Gingham Ribbon, Corner Rounder

~Enjoy & TFL~

20 September 2007

Cheesecloth Heartfelt Thanks


Thanks to 'Jovi' for the inspiration on this card!

Stamps: Heartfelt Thanks, Cheesecloth Background, Fine Lace Background, French Script Background
Paper: Elegant Eggplant, Very Vanilla, Going Gray
Ink: Elegant Eggplant, Old Olive, Basic Black
Accessories: Hodgepodge Hardware
Techniques: Two Step Stamping, DTP
~Enjoy & TFL~

10 April 2007

Dazzling Flowering Diamonds


These swaps went in the mail today, Monday, priority to our hostess JoAnn of the QC Swappers Group. This months theme was 'a technique swap' ~ I chose 'Dazzling Diamonds' although its hard to see in this pic!! The large flower is done using this technique!

First of all I must give credit where credit is due on this awesome layout but it's killin' me that I can't find you!!! I am sure I found this on her blog .. I even printed out the picture and thought I had the info on there .. but looking back I don't *uh* I am soo sorry for that!!! ;o( The pic I printed out is really small and it looks like her name may be on the pic but it's way too small for me to read ... boohoo!! So for those of you in the swap, I've printed out the recipe on the back but wasnt able to give proper credit on my layout idea!!

So since this is for the QC Swapers group, it did involve a few steps -- but that is A-OK ;o) it's a total of 7 layers. I started out by stamping the French Script background on Confetti Cream cardstock using So Saffron stampin' ink. Then I did the 'rock n roll' technique on my flowers using both perfect plum and pretty in pink stampin inks -- stamping these over the french script background followed by the Mellow Moss leaf imprints. Then I punched out just the two right corners using the ticket corner punch. Next I used the paper piercing tool and stampin' grid to pierce a series of holes in the two same corners that I just used the corner punch on --- doing three holes and then two holes above the three -- on both the top and bottom corners. This piece was then layered on a piece of Pretty in Pink card stock and this piece only hand the two right corners punched out with the ticket corner punch too! Then these two pieces were attached to a piece of basic black card stock.

Now back to the top -- on top of the confetti cream I cut a piece of Pretty in Pink that would run across the top, I think it's about 2 inches wide. Then layered on top of this is a piece of Perfect Plum card stock cut a bit smaller and on this one I paper pierced a line both across the top and bottom. Then I tied a piece of Olive narrow organdy ribbon as well as copper cord around these two pieces and tied it to the side and taped it down. Then came the fun part ~ ~ ~ The technique part!! I used the Petal Prints stamp set and the Perfect Plum and Mellow Moss Stampin' Write Markers to color and stamp the flower and stamp it to the Glossy White card stock and let it dry really well. Then using the stamp-a-ma-jig I positioned the outline stamp over that and stamped it in basic black. Once that was completely dry I took my VersaMark pad applied the pad direcly to my paper (pad upside down directly on cardstock) and completely covered the image (piece of cardstock I had cut out) then I immediately applied the Iridescent Ice Emboss Powder to the image and using the Heat Tool heat until it melted! See the complete & awesome SCS step by step with pictures tutorial here. Then I simply punched a few holes in that image for two vintage brads and applied that to a piece of basic black card stock. Then the very last step was using stampin' dimensionals to mount the dazzling flower to the front of the card!

I made 12 of these cards ... and once you get started and do them in an 'assembly line' fashion things can move along pretty quickly!!

One thing that I would do differently next time is play around a bit more with the backround on the glossy white piece --- it just looks a little 'naked' for my tastes I guess. Maybe that is because the base of the larger piece is confetti cream I suppose. So tonight I did take a piece of the gw and I inked up the canvas background using So Saffron and stamped it on the Glossy White piece first --- then I stamped the flower --- then did the dazzzling diamonds. That looked a bit better but it really couldnt be seen once the techniquie was complete. So maybe a bit of a darker color would be needed --- but it did give is some color!

Overall I guess I am happy with the way the technique turned out but I will need to play around with the background a bit more and see what I can come up with ;o)

~TFL & Enjoy~

04 April 2007

Upside Down Joy


Here is one of four cards that I am doing for my April SU! demos ~ inspired by the January Stampin' Success and SCS'er Kristin Moore Thanks for your inspiration Kristin ~ ~

I started with a Marigold Morning cardstock base and using only the Polka Dots & Paisley stamp set I stamped the background using Marigold Morning ink pad. I then stamped the 'find joy in the little things' using Vintage Violet ink.

Then using a piece of the Vintage Violet cardstock and stampin' pad I randomly stamped on that piece of card stock and then 'roughed it up' using the cutter kit around all four sides (I just love that tool!!!) I then wrapped a piece of the vintage violet stitched grosgrain ribbon around that piece and tied it in the front. Remember .... you can still get this awesome ribbon .... #107885 $7.95 thru June 30th ... it's just not in the catalogs but it has been carried over since it was soo popular. The other colors are available yet too!!! Stock up now ;o)

Then, once again, I did the same thing on a piece of Old Olive card stock with Old Olive ink --- and then using the cutter kit I used the 'perforating tool' and ran it across just the top of the old olive piece ... just to give it a bit of dimension ... folding it forward just a bit

Then came the fun part with the tag punch ... cuz I love my tag punches!!! (well all punches for that matter!) Using the Rose Red and Old Olive Stampin' Write Markers I colored the flower and huffed and puffed and stamped the flower on confetti white paper and THEN punched it out UPSIDE down mind you *wink wink* and punched out another Rose Red tag to mount it on. Once the two tags were secured together with Snail adhesive, I used a few stampin' dimensionals and attached that to my card front.

It was a fun card that came together relatively quickly!! So far the participants at my demos have been *oohed* and *ahhed*!! ;o)))

As always, here is my recipe:

Stamp Sets: Polka Dots & Paisley
Card Stock: Marigold Morning, Vintage Violet, Old Olive, Rose Red, Confetti White
Stampin’ Pads: Rose Red Stampin’ Write Marker, Old Olive Stampin’ Write Marker, Old Olive, Vintage Violet, Marigold Morning
Accessories: Vintage Violet Stitched Grosgrain Ribbon (107885 - 7.95), Small and Large Tag Punches, Stampin’ Dimensionals, Cutter Kit

~TFL & Enjoy~

13 March 2007

Sweet-n-Simple Make-n-Take

Here was a simple and sweet make-n-take that I did with my customers at the end of the SAB period in February --- this was a fun one and everyone did soo good ;o)

I owe a big thanks to SCS'er 'whoopsie daisy' for this fun and simple idea. I changed it just a bit to use with my group.

I had them stamp the On the Spot background on the front of the card first. Then I asked them to stamp the 'sweet stuff lollipop' on the front in basic black trying to center that and explaining that we didnt want to stamp too low as the punch needed to come in and punch OUT the lollipop but leave the 'sweet stuff' saying there. Then we made the square punch (hold the punch upside down for the most controlled punch -- you can see where you are going!). Next I had them punch the lollipop stamp again on green galore and cut out just the lollipop and adhere that to a stampin' dimensional and center that sideways in the square (with the cardfront closed). That's it for a fun and cute make-n-take card!!!

As always, here is the recipe:
Stamp Sets: Very Punny (SAB Free Set), On the Spot BG
Card Stock: (From Color Coach) Pink Passion and Green Galore
Stampin’ Pads: Pink Passion and Basic Black
Accessories: 1 ¼” Square Punch, Stampin’ Dimensionals


I'll soon be posting the cards that I am demo'ing this month --- what a fun Spring mini we have to work with!! Yeah SU!!!

~Enjoy & TFL~

09 March 2007

*Cheers* to JanTink


Have I mentioned that JanTink is awesome? I just love her 'stuff' ...and her blog is absolutely, positively, boisterously entertaining .... every single entry is just a hoot to read!! Maybe someday I will get to meet her in person --- you know like a rock star!!! ;o))
So anywhoo ... I took inspiration from Jans card and used a stamp set that I had in my stash to demo this card! I wanted to feature Jan's punchy punch idea here as to how to make the background piece larger for placement behind the 'cheers' piece shown here.
Now this card is not the most perfect that I have done --- so please don't look too closely... promise?! lol This is one that I did at my last demo and once again I didnt take the five minutes I probably should have to line up my brad holes exactly the way I should have if I would have been sitting in my own stampin' space working on this one!!
Another *fun twist* I added to this demo was I asked one of my fun customers who I knew had the 'delight in life' stamp set to bring it along to the demo --- so I prepared the card stock ahead of time (cutting it, etc) for two cards ---one we did with the Delight in Life and one we did just like this one --- so they could see the same card layout but two different stamp sets --- two total different looks. That was fun!
I am really lovin' the "In Colors"!! What am I going to do when the new big catalog comes out?!!? Oh Dear!!! I don't even want to think about that yet ---- *sigh*
The picture really makes the grosgrain ribbon look dark -- but it's really the Chocolate grosgrain!!
Here is the usual 'recipe' if you are interested ~ ~ :
Stamp Sets: The Snowflake Spot
Card Stock: Cool Caribbean, Naturals White, Old Olive, Regal Rose, Marigold Morning
Stampin’ Pads: Chocolate Chip, Cool Caribbean, Old Olive, Regal Rose, Marigold Morning
Accessories: Chocolate Grosgrain, 1/14 Circle Punch, Keytag Punch, Ticket Corner Punch, Gold Brads
~Enjoy & TFL~

08 March 2007

Touch of Nature a la carte


Here is another card that I did for my 2nd round of February SAB demos! I absolutely loved the card that the famous SCS'er atomicbutterfly did, and I wanted to try and somewhat re-create that but also I wanted to use the Leaves a la carte jumbo wheel from the winter mini.
I started out by stamping the Print Pattern background stamp on the Naturals Ivory carstock using So Saffron ink. Then I used the Mellow Moss Jumbo Wheel Cartridge and the Leaves a la carte Jumbo Wheel and lined this up across the cardstock at an angle with a piece of the wheel guide --- that works really slick! I punched a hole in the upper top left-hand corner for the ribbon, pulled the ribbon thru and the background piece is done!

I then stamped the Touch of Nature bird on Naturals Ivory cardsock and used assorted stampin pads (So Saffron, Always Artichoke, Close to Cocoa, Sahara Sand) and the aqua painter to color him in.
As a side note: For those of you who have not used the aqua painters before ~ they are just wondeful! Consider it like 48 colorful pens in ONE pen!! Just take your stampin pad and while it is closed, squeeze the lid to the pad. Now open it --- see how you have some ink on the inside of the lid? Use this as your color palete to pickup some color with your aqua painter full of just plain tap water from your faucet! Then start 'painting' away --- picking up more color as you need it!

Once the bird and branch was 'painted', I fanned my piece of cardstock thru the close to cocoa stampin pad to color each of the four edges of the cardstock. I then also used a piece of a sponge and sponged the edges just to add a bit more of color to that piece as well --- also using Close to Cocoa. I layered this on a piece of always artichoke cardstock.
Next I used the paper piercing tool out of the Crafters Tool Kit and pierced a straight line across the bottom of piece of Kraft card stock. (I just love the template that comes with this to make the straight lines soo possible!!) I stamped the sentiment above my piercing and then sponged this piece of cardstock too!
Then I simply taped all of the pieces to the card front and whoola!! On one card, I did vary where I put the ribbon --- I punched the hole and put it in the kraft piece, to the left side of the Touch of Nature Stamp and it looked pretty cool there too!
Here again is the 'recipe':
Stamp Sets: Touch of Nature, Print Pattern, Leaves a la carte Jumbo Wheel (Winter Mini)
Card Stock: Always Artichoke, Naturals Ivory, Kraft
Stampin’ Pads: So Saffron, Mellow Moss Jumbo Wheel Cartridge, Basic Black, Always Artichoke, Close to Cocoa, Sahara Sand
Accessories: Crafters Tool Kit (paper piercing), Moss Gingham Ribbon, 1/16” hole punch, aqua painter, sponge, wheel guide
~Enjoy & TFL~

07 March 2007

Happy Birthday Dearie!!

This was one of the cards that I demo'd late in February. I had two groups of gals that actually got together twice last month to take advantage of the SAB promo so I had to quickly come up with a few new ideas for them ~ and this one was one them ;o) I had my DH birthday in mind when I was thinking about this too. But I must give credit to SCS'er AmyR for this awesome layout ~ Many Thanks Amy!! I changed her 'thank you' card into a 'guys birthday card'. I never seem to have enough 'guy cards' on hand!!

I used the Color Coach to come up with my card stock colors for this card. The base is Old Olive, topped with a Bravo Burgundy base. The truck is framed in More Mustard, Old Olive and Naturals White.

The stamp sets I chose were Classic Pickups, Flannel Plaid BG and Everyday Flexible Phrases.

The Stampin’ Pads I used included Bravo Burgundy, More Mustard, Basic Black, Old Olive. When I colored in the pickup I used the Aqua Painter --- what a fun and handy tool that is!!

Other accessories included: Linen Thread, Copper Cord, Vintage Brads, Stampin’ Dimensionals, 1/16” Circle Punch and the Tag Corner Punch.

~Enjoy & TFL~

21 November 2006

Tribute Totally 2 Taylor


Err... maybe the title should say "Totally Cased"???

Anywhoo....I am a huge fan of Taylor VanBruggen (Taylored Expressions). Like if she were a rock star I'd go to her concerts and have to sit in the front row kinda fan...get it? *wink wink* She is such an awesome stamper---her ideas continue to amaze me!! Like where does she come up with all of her wonderful awesome ideas? I'll just keep daily tabs on her blog for the pure amazement!!

So I totally fell in love with a card she posted on November 9th---wowzers!! She just 'whipped' it up...I didnt exactly do that but I got er' done! lol I didnt have all the supplies that Taylor had but I made due. I was also trying to only use SU! supplies as I am going to demo it at a workshop next week. I probably wouldnt demo such a detailed card at a workshop but this is a group of gals that get together with me pretty much on a monthly basis to do a SU! workshop so I think they will be ok with it as far as the degree of stamping goes. Most of them have all of the 'tools' it takes to make this card so I think they will be excited to see that they too can make it with the supplies and tools that they already have at home!

The pic may not show it very well but I double stamped the background with two background stamps---Linen and French Script--in that order both using More Mustard. Amazing that the FS comes across looking a bit darker in color even though it is the same color ink!! I sponged the Cool Caribbean cardstock with Chocolate Chip ink after using the white gel pen. I used the sponge dauber on the big flower to apply the cool caribbean colors as I can get a more precise application this way. I did this after stamping the middle More Mustard flower. Then I lightly sponged this whole image using the Chocolate Chip sponge.

One thing I thought of that could possibly change the whole look of the card would be to take the large flower and do the cracked glass technique on it---that would be very pretty but add more time to the card project.....

Here is the list of 'ingredients':

Stamps: Mixed Bouquet, French Script, Linen, Tiny Talk,
Card Stock: Chocolate Chip, Very Vanilla, More Mustard, Cool Caribbean
Stampin' Pads: Chocolate Chip, More Mustard, Cool Caribbean
Accessories: Cutter Kit (distressing tool), Mustard Grosgrain Ribbon, Copper Metal Edge Tag, Sponge, Sponge Dauber, White Gel Pen, Stampin' Dimensionals, Crafters Tool Kit, 1/16" Punch, Mini Glue Dots

~TFL & Enjoy~