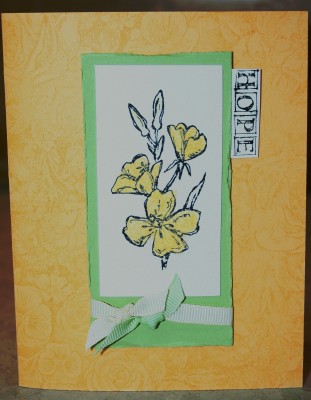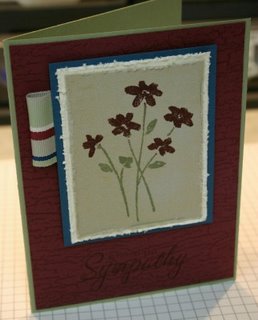
Supplies you'll need for this project
Stamps
Card stock
Alcohol markers
Rubbing alcohol
Misting bottle
~TFL & Enjoy~

The only sad thing is she is sooo far away from me in distance -- she lives in NC. But the fun thing is we communicate very regularaly via email AND she knows how to send pics so it's like we 'virtually' stamp together ;o))
These swaps went in the mail today, Monday, priority to our hostess JoAnn of the QC Swappers Group. This months theme was 'a technique swap' ~ I chose 'Dazzling Diamonds' although its hard to see in this pic!! The large flower is done using this technique!
First of all I must give credit where credit is due on this awesome layout but it's killin' me that I can't find you!!! I am sure I found this on her blog .. I even printed out the picture and thought I had the info on there .. but looking back I don't *uh* I am soo sorry for that!!! ;o( The pic I printed out is really small and it looks like her name may be on the pic but it's way too small for me to read ... boohoo!! So for those of you in the swap, I've printed out the recipe on the back but wasnt able to give proper credit on my layout idea!!
So since this is for the QC Swapers group, it did involve a few steps -- but that is A-OK ;o) it's a total of 7 layers. I started out by stamping the French Script background on Confetti Cream cardstock using So Saffron stampin' ink. Then I did the 'rock n roll' technique on my flowers using both perfect plum and pretty in pink stampin inks -- stamping these over the french script background followed by the Mellow Moss leaf imprints. Then I punched out just the two right corners using the ticket corner punch. Next I used the paper piercing tool and stampin' grid to pierce a series of holes in the two same corners that I just used the corner punch on --- doing three holes and then two holes above the three -- on both the top and bottom corners. This piece was then layered on a piece of Pretty in Pink card stock and this piece only hand the two right corners punched out with the ticket corner punch too! Then these two pieces were attached to a piece of basic black card stock.
Now back to the top -- on top of the confetti cream I cut a piece of Pretty in Pink that would run across the top, I think it's about 2 inches wide. Then layered on top of this is a piece of Perfect Plum card stock cut a bit smaller and on this one I paper pierced a line both across the top and bottom. Then I tied a piece of Olive narrow organdy ribbon as well as copper cord around these two pieces and tied it to the side and taped it down. Then came the fun part ~ ~ ~ The technique part!! I used the Petal Prints stamp set and the Perfect Plum and Mellow Moss Stampin' Write Markers to color and stamp the flower and stamp it to the Glossy White card stock and let it dry really well. Then using the stamp-a-ma-jig I positioned the outline stamp over that and stamped it in basic black. Once that was completely dry I took my VersaMark pad applied the pad direcly to my paper (pad upside down directly on cardstock) and completely covered the image (piece of cardstock I had cut out) then I immediately applied the Iridescent Ice Emboss Powder to the image and using the Heat Tool heat until it melted! See the complete & awesome SCS step by step with pictures tutorial here. Then I simply punched a few holes in that image for two vintage brads and applied that to a piece of basic black card stock. Then the very last step was using stampin' dimensionals to mount the dazzling flower to the front of the card!
I made 12 of these cards ... and once you get started and do them in an 'assembly line' fashion things can move along pretty quickly!!
One thing that I would do differently next time is play around a bit more with the backround on the glossy white piece --- it just looks a little 'naked' for my tastes I guess. Maybe that is because the base of the larger piece is confetti cream I suppose. So tonight I did take a piece of the gw and I inked up the canvas background using So Saffron and stamped it on the Glossy White piece first --- then I stamped the flower --- then did the dazzzling diamonds. That looked a bit better but it really couldnt be seen once the techniquie was complete. So maybe a bit of a darker color would be needed --- but it did give is some color!
Overall I guess I am happy with the way the technique turned out but I will need to play around with the background a bit more and see what I can come up with ;o)
~TFL & Enjoy~


I stamped 'loved' in elegant eggplant and then punched that out using the window word punch and added two gold eyelets to each side. I applied a dimensional to the back of that and attached it to the front of the card and then added the gold cord around the EE card stock.
Here is a list of all of the ingredients used:
Stamps: So Very (SAB 2007), Wild Rose, Adia Cloth Background
Cardstock: From the Color Coach—Old Olive, Elegant Eggplant, More Mustard, Naturals Ivory
Stampin' Pads: Elegant Eggplant, Old Olive, Mellow Moss, Creamy Caramel
Accessories: Gold Brads, Window Word Punch, Crystal Effects, Gold Cord, Stampin’ Dimensionals, Cutter Kit (distressing tool), Crafters’ Tool Kit
~TFL & Enjoy~