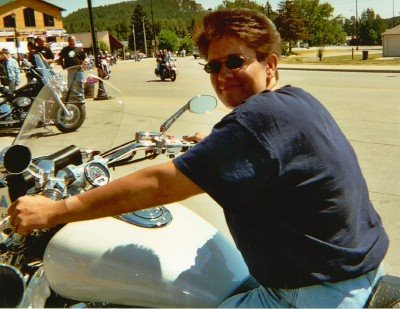
Here are some fun moments of our 2nd Annual Punkin' Pickin' Party held at our place this past weekend! The sun was out but the wind was too -- guess that is better than rain tho ;o)
A fun time was had by all!!! I'm already thinking about what varities to plant for next year!
29 September 2009
24 September 2009
Tis' The Season!!!
The PPP Season that is!! Here is the first load out of the patch tonight for us. This will give me a good start to get the different areas decorated around our place -- the old chevy, the garden shed, the bend in the driveway, the mailbox area...gee... I may need to go pick some more ;o) Do you see the white and blue ones? FuN!!!
I love fall!!!!!21 September 2009
Will U B My Valentine?
I know, I know! It's the end of September but my Dad brought this out to me the other night and I just had to share! I'm not sure what year this would be from but this is an old Valentine my Dad received from his sister Claudia, my Auntie CJ ;o)
I thought by sharing it here on my blog it would bring back memories for her -- do you remember what year Auntie CJ? ;o)
Notice even back then how they were being crafty and letting her move at the waist? ;o)
I thought by sharing it here on my blog it would bring back memories for her -- do you remember what year Auntie CJ? ;o)
Notice even back then how they were being crafty and letting her move at the waist? ;o)
20 September 2009
Floor Tiles?
Yep! Another fun thing to do with floor tiles!
I've been busy with these lately - making a series of different family names for a gal who will distribute them at their wedding - kinda as a thank you to the people who helped them with different projects.
I made this using my Cricut die cut machine and vinyl. SUCH fun and really easy!! The tiles are about a 12x12 and are a neutral color which makes them even easier to choose your vinyl colors for. The gal that commissioned me to make these found awesome looking black iron plate stands to go along with these as well!
19 September 2009
Ohh Wee!
Look At ME!!!! Circa 1930's ~ not lookin' too shabby eh? Our project is nearly complete! My hubby is working on replacing the floor on the inside now so once that's done it will be 'done done' ;o)
I love driving by it coming in and leaving our driveway now - what a happy thing to see!!!
Either later on this fall or next spring we will move the pasture fence behind it in a bit and then landscape around it as well ;o)
Thanks for following us as we completed this project!!!
18 September 2009
Boxes n' Shutters
The Boxes & Shutters are done and FULL of fun fall stuff ;o) This is my fave time of year --so why not decorate our 'new' shed too!!!
Tomorrow will be the 'big picture' day -- the shed completed -- so you will have to run back and compare from the first postings to the last postings. Honest! It's the same shed ;o)
17 September 2009
Pin A Big Metal Star on Me!
I just love these 3-D metal stars -- and now I have the perfect place for one too ;o) I found this while we were out in South Dakota this summer and just had to have it -- knowing this is where I was gonna put it eventually!
Perfect Huh? Stay tuned as we are almost done with the garden shed project...you will soon see the 'full picture'!!!
16 September 2009
Fillin' In....
...the white primer is now GONE! The painting and trim work is now done done done!
Next step will be to fill in the gap at the bottom of the building. The building is actually sitting on blocks, remember? Filling it in may deter the 'varmits' from trying to make it their home and it will also make it look much nicer!
15 September 2009
Paint ME!
Soo...moving on to the next step! Primer! A good coat all the way around. It soaked it right up!!
Second step of the painting process was to paint the dark green trim first, two coats! Followed by the tan color, another two coats -- here you can get a peek at what the colors will look like together ;o)
It's coming together nicely! Stay tuned for more pics in the coming days ;o)
Second step of the painting process was to paint the dark green trim first, two coats! Followed by the tan color, another two coats -- here you can get a peek at what the colors will look like together ;o)
It's coming together nicely! Stay tuned for more pics in the coming days ;o)
14 September 2009
Payn' Special Attention....
This is the most attention the shed has had in awhile but overall it's in awesome shape for being circa 1930's wouldnt you say?
We did replace some of the cedar siding where needed...these pictures were taken in that process - quite a few more boards than what is pictured here were replaced. Below the three windows, for one, was all replaced. Most of the front of the building was as well, there were a few we left near the peak as orginial.
All four windows were replaced for new - that was easier than to try and fix the ones that were in there. However, the old were just not thown away - I have plans for those too!!! ;o)
13 September 2009
I'm home!!!
It was a successful move - the building did not shift at all during the move. Dean did use some braces on the inside of the buliding for the move so that may have helped.
Resting spot for the night -- thought this was a pretty picture!
JD & Dean checking over the spot that the new shed will call home
Resting spot for the night -- thought this was a pretty picture!
JD & Dean checking over the spot that the new shed will call home
12 September 2009
THE move!!!
Here we go! This took a little coordination between me leading and stopping traffic coming at us down the road because as you can see we needed the whole road!! My hubby drove the tractor pulling the shed and then my brother followed up the rear of the parade making sure nothing shifted or moved on the trailer.
The 1st picture is just leaving the farm. We had to take the long way around to our house - normally just a few mile trip - but because they were replacing a box culvert near our house that road is closed.
The 2nd picture is us crossing the dredge ditch bridge - a tight fit but no troubles.
The 3rd picture is just as we approached our driveway!!!
The 4th picture is pulling in to our driveway - with a sigh of relief ;o)
Once we got it home we had enough daylight to just park it on the trailer where it sat until the next afternoon when my brother was able to come back over and help us actually set it.
Stay tuned for the next series of pics ;o)
11 September 2009
Pre TLC
Here she is!!! ...before a little TLC ;o) So you are thinking to yourself...how did that even make the trip in one piece?! IT DID!!! Yeah!!! Please keep in mind circa 1930's ;o) She has done very well over the years, huh? A new roof was put on in the late 80's so that is still in good shape.
Stay tuned for more pics over the next few days! It's been a fun project to see thru the progress!
10 September 2009
Backside of the building.....
09 September 2009
Prepping for the move....
08 September 2009
Treasures.....
Hello Everyone!!!
I want to share with you my recent non-stamping activity ~ I'll start out with this picture to get you into the mind set of OLD ;o) These are some 'treasures' I stumbled upon as I was walking around the grove at the farm prepping for our most recent project. Cool huh? This is exactly how I found them..no staging for this picture! Even better!! ...Of course I had to take a few of these items home with me to be used in the landcaping decor for our new addition ---
For the past few years I have had my eye on an old 13' x 15' chicken coop over at the farm. The history behind this old building goes back quite a ways -- my Dad tells me that my Great Great Grandfather built it circa 1930's. It wasnt being used for anything currently and I thought it would look cute sitting at our place as a 'garden shed'. So a week ago, after spending a few nights prior getting it all cleaned out, my husband and brother loaded it up on a trailer and pulled it over to our place with a tractor via the back roads. We have spent the past week giving her a little TLC..a few new boards here and there...a coat of primer and a few coats of paint....stay tuned over the next few days of pictures along the way...it's been a fun project and it will be done in time for the Punkin' Pickin' Party this fall!!! We will continue with moving some of the pasture fence and landscaping either later this fall or next spring -- so it will be a work in process for awhile yet ;o)
Subscribe to:
Posts (Atom)