24 December 2006

More fun with Tall Thin Tins


I created two more gift card holders yesterday for my two cousins. The one pictured above is for Tom who just graduated from Army basic training late this summer. He is also an avid hunter. So his gift card is for hunting supplies of his choice. I decorated his tin around the 'camo theme' but had to add the 'Make Merry' Christmas theme in there somewhere too! *lol* The tag is gold embossed on the brushed gold card stock. I tied it on with a piece of regular twine and gold cord. I made the name tag on top with the window word punch and carried the twine and gold cord theme to the top of the tin as well. I just hot glued a piece of our stitched grosgrain ribbon around the rim of the lid as well. Another simple tin completed!!

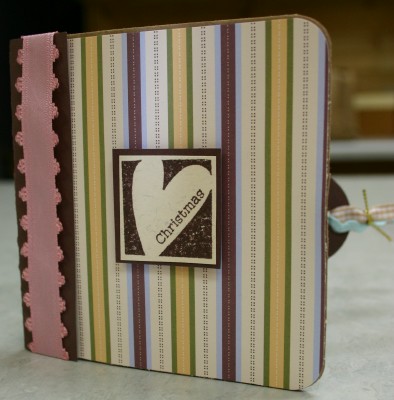
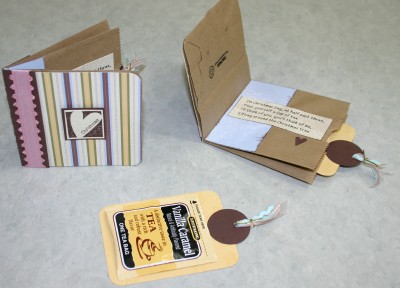
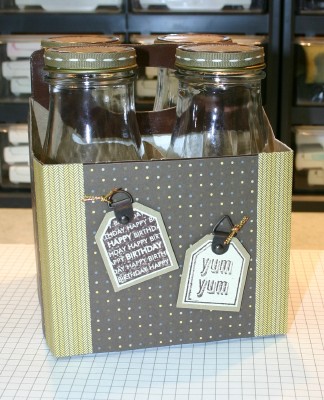
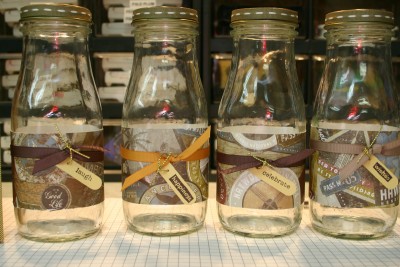
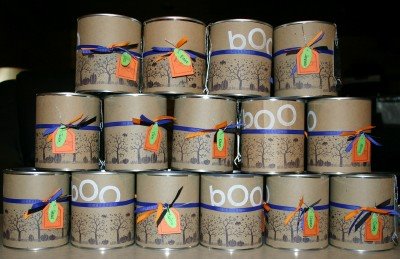
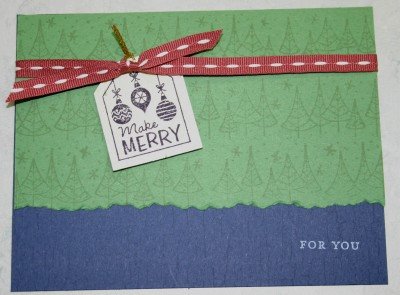
This is is for my cousin Annie who absolutely loves Starbucks! So trying to go with the chocolate or coffee theme I used printed papers from the Spring Flowers Designer Series double sided paper collection. I tore a piece of the paper for the 'top of the bottom portion' of the tin (because I was trying to hide the fact that I cut the brown flower print a bit shorter than I had hoped!!) so this covered up my mistake!! *lol* I also used the same 'Make Merry' tag as well as the stitched grosgrain ribbon and window word punch for her name tag just as I did on Toms tin. I did use a mini gold bow to decorate the top of her tin. For a little more 'floof' I cut a few pieces of the chocolate grosgrain ribbon and folded them over and tucked them under the bow. I did use a hot glue gun to adhere the bow, ribbon and window word tag to the top of the tin ~ just to be sure all would stay!

We will be on our way to a Christmas Eve celebration here in a few minutes to celebrate with family ~ it's just a short 3 mile drive to the farm I grew up on. I always look forward to this time of year. I hope you do too. A time for joy and happiness ~ a special time of year ~ nothing could be better.

Blessings and Cheers!

~TFL & Enjoy~

21 December 2006

Bandage tins are not just for band aids...


.....they are for creating on too!!! Here is a very quick project I did tonight. I purchased these from OrientalTrading.com The product number is 65/90065 and they are called 'tall thin tins'. 3 come in a package for $4.95. They measure2 1/4" x 3 3/4" x 1 1/8".


I started out by cutting a piece of SU! Slumber Party designer paper and I just taped it to the tin using sticky strip tape. Then I just simply cut a piece of the 'Flirty' ribbon (from the Winter Mini) and hot glued that ~ gathering it in the front to glue it. I ran a piece of the sliver cord around the top of that, gathering and glueing that in the front too. Then I silver embossed a S is for Smile tag and used my tag punch to punch that out very easily and quicky ;o) (I loooovveee my tag punches!) I punched a hole in the top of the tag and ran a small piece of light pink narrow organdy ribbon thru it and gathered it with a small pice of silver cord. Then to mount the tag to the tin --- I had to double up on my dimensionals --- I just stacked one on top of another to get the 'height' I needed and then simply attached it to the tin.


I enclosed a gift card for the recipient ~ perfect size for that!!! I think I am going to make some different versions for gift cards for christmas presents ~ rather than just handing them an envelope these would be fun tins to open and certainly not expected!!


~TFL & Enjoy~

20 December 2006

Female Frapp Attacks!!!


~~~~~~~~~~~~~~~~~~~~~~~~~~~~
Here is what kept me busy tonight!! I made up two female frapp gifts tonight and they were pretty much identical---but one was for a birthday gift Friday and one was for our hairdresser ~ just a little thank you for a Christmas gift but without the Christmas theme. Really no reason for that other than to say it was easier to make them almost the same rather than different!! *lol* I have a hair appointment Friday morning so I'll deliver it then.
As always, everything is SU! The ribbon is from the Winter mini ~ Flirty. The chocolate chip ribbon was fun to use in this project....I just hot glued it as I went around the bottle. The pink ribbon was fun to use too but it is not soo 'forgiving' when it came to finishing it off on the back of the bottle...the chocolate chip kinda all flowed together where the pink did not. The chocolate chip ribbon is more gathered where the pink is not....make sense? I wanted to add something more around the pink ribbon but when you insert the bottles back into the carton they get to be too 'bulky' so I was not able to add anymore without runnning into problems there. I also used the hot glue gun and attached grosgrain ribbons around the bottle caps too.
The paper is from the recollections designers series ~ that stuff is sooo pretty! I was able to cover both of the frapp boxes with just one sheet! Then of course pieces of the coordinating paper for the bottles and box sides with tons of that left over for the next projects *smiles*
The tops of the bottles were covered using the two circle punches and the 'riveting' stamp set. This is the only spot where the theme differed ---'enjoy your day' to 'thanks so much'.
The tag on the front of the box was done by gold embossing on the brushed gold card stock ~ I just love that look!! I then attached a piece of my *hoarded* hodge podge hardware and attached that to the wide organdy ribbon with a piece of gold cord.
Then the best part ~ I filled each bottle up with yummies!!! M&M's, Hersheys Kisses, Milk Duds and Jelly Beans
I hope they enjoy them ~ I enjoyed making them!
~TFL & Enjoy~

19 December 2006

So Very --- 2007 SAB


Here is the other group of cards that I completed this weekend for a SAB card swap over on SCS---same hostess just a different group. This is using the 'So Very' SAB stamp set. I just didnt use the 'so very' in the set!!! *lol* I thought I could show how to use the set in other ways too....not necessarily using the so very in each design. This would be a great card for many occassions.

It's hard to see but I did apply Crystal Effects to a portion of the Wild Roses just to give it a bit if dimension. In the picutre it would be the deeper colors of purple on the flower is where the CE was applied. They are really quite pretty IRL :o)

The elegant eggplant cs is is stamped with the Adia Background using elegant eggplant ink. I stamped the roses and then used creamy caramel and a sponge to go over the top of them --- just to give them a worn look or antiqued look. I then used the new SU! distressing tool to distress the three sides and tore the bottom .

I stamped 'loved' in elegant eggplant and then punched that out using the window word punch and added two gold eyelets to each side. I applied a dimensional to the back of that and attached it to the front of the card and then added the gold cord around the EE card stock.

Here is a list of all of the ingredients used:

Stamps: So Very (SAB 2007), Wild Rose, Adia Cloth Background
Cardstock: From the Color Coach—Old Olive, Elegant Eggplant, More Mustard, Naturals Ivory
Stampin' Pads: Elegant Eggplant, Old Olive, Mellow Moss, Creamy Caramel
Accessories: Gold Brads, Window Word Punch, Crystal Effects, Gold Cord, Stampin’ Dimensionals, Cutter Kit (distressing tool), Crafters’ Tool Kit


~TFL & Enjoy~

Big Blossom & So Very Mix --- 2007 SAB


Here is a card I finished up this weekend for a swap that I am participating in over on SCS ~

It's hard to see in the pic but I embossed the flower doing the 'kissing' technique and I mixed together before embossing:
Stampin Emboss Detail White
Stampin Emboss Detail Gold
Stampin’ Glitter Romantic Red
It sparkles IRL ;o) If I were to do it again I would probably leave out the gold and just do the white and red glitter and give that a try for a different look....

I started by stamping the Vintage Violet cs with the linen BG using Vingage Violet ink, then I did the Big Blossom on top of that so it has a bit of a texture look under the embossing. Then once the embossing was done I cut each Big Blossom out. Also, the Marigold Morning cs background is stamped with the Linen Background stamp using Marigold Morning ink as well.

The 'So Very' was stamped off once before being stamped on the MM cs. I played around with this for a bit before deciding to do it this way--just so the 'happy' would so up a bit better.

As always, here is my list of ingredients:

Stamps: Big Blossom (SAB 2007), So Very (SAB 2007), Happy Everything, Linen Background, Wild Hearts Background
Cardstock: Bravo Burgundy, Marigold Morning, Vintage Violet
Stampin' Pads: Vintage Violet, Cranberry Crisp
Accessories: Mixed together for the BB flower before embossing– Stampin Emboss Detail White, Stampin Emboss Detail Gold & Stampin’ Glitter Romantic Red. Linen thread, Mini glue dots, Rich Regals buttons, Ticket Corner Punch
Techniques: Embossing


~TFL & Enjoy~

16 December 2006

Find Joy In The Little Things

FREE & FUN!!! Now what could be better than that??? This Polka Dots & Paisley stamp set was such a fun and pleasant serendipity to receive in the mail ~ ~ a package from Shelli and Stampin' UP! How awesome to feel appreciated by such an neat company!


I had a second Thursday night to play with my fun new (& free!!) stamp set that I received Tuesday in the mail!! So here is what I created ~ ~ sorry for the shadow off to the left side of the picture but I was running late getting ready for work---I would have rather just sat and stamped all night ~ lol!

I must give SCS'er Miss Beate credit for the layout of this card --- one of my all time faves that I have cased over and over again for different occassions --- just changing the colors and stamp sets --- I just love doing this with ribbon now and the 'happy' was just screaming at me to becoming an oval tag!! *wink wink*


Stamps: Polka Dots & Paisley
Cardstock: All from the 2006 In Colors --- Marigold Morning, Vintage Violet, Cranberry Crisp

Stampin' Pads: Marigold Morning, Vintage Violet, Cranberry Crisp
Accessories: Ivory Wide Organdy Ribbon, Stitched Gingham, Gold Cord, 1/16" Punch, Large Oval Punch, Ticket Corner Punch, The Tearing Edge

~ Enjoy & TFL~

15 December 2006

Tea 4U


These went out in the mail tonight ~ ~ en route to my 2006 secret sisters that I have had over on SCS thru a group called DDSS (dabblin demos secret sisters is what I think it stands for anyway!! lol) Christmas tea! I hope they enjoy them!! I am also being sneaky and putting one in the mail to my current DDSS too...humm...we will see if she catches on...this could be fun....she would just find out a weee bit early is all!! I can't believe January is already reveal month for this current round! Time flies when you are have fun, eh?

I received one similar to this last year just before the holidays from my Sista' Michaeleen (aka 'missmike' on SCS) and have been thinking alllllllll year as I look at it on my board: "I am going to make some of these next season and send them out" I also made up bunches and gave them to my Mom to hand out to her friends as well ;o)

Here is what the inside poem says:
On Christmas Day, at half past three,
Pour yourself a cup of tea.
I’ll think of you, you’ll think of me,
Sitting around the Christmas tree.

These bags are smaller than the typical bags so to give you an idea the front of these measure 4" by 4" and they are really easy to complete! Bascially you just fold the bag in half and start to decorate!!

Here is a list of the 'ingredients':

Stamps: Everyday Flex Phrases, Bold Shapes, Year Round Fun II
Paper: Four Seasons, Chocolate Chip, So Saffron
Ink: Chocolate Chip, So Saffron
Accessories: Flirty Ribbon, Caramel Gingham Ribbon, Narrow Organdy Light Pink Ribbon, Gold Cord, 1 3/8" Circle Punch, Heart Punch (for hole in tea tag for ribbon) Vanilla Caramel Tea Bags, Pop Up Glue Dots (to hold tea bags on tea tags), extra small brown bags


~TFL & Enjoy~

14 December 2006

Magic Reindeer Dust


This was a super fun project --- I made it for the kids --- really!!! *lol* I came up with a list of names of friends & family that had kids around the age that would still enjoy something like this and then I called my Mom and asked for her list too! Her list had friends that have grandkids that will think this is fun too! I then got busy in my creative space. Thanks to craftqueen for her inspiration on this project!!

This was another project where there was really no stamping involved --- just the compuer for the little sayings. I typed the saying in Word once and then just 'cut and pasted it' 8 times doing it in two columns printing it out on whisper white card stock. I used my Cricut (aka: Jiminy) machine to cut out the reindeers ~ I chose the 2" setting. The reindeers are cut out of Chocolate Chip and Creamy Caramel cardstock. It's kinda hard to see but the li' reindeers really do have some features to them---the Circut does all of that work for you as it cuts them out. It thought about adding a red nose or adding some of the fun eyeballs to them but I didnt have enough on hand to do all 25 bags...then how do you decide which child gets which bag?! So I just left them plain! The Cricut cartridge that has this reindeer I think is from Animal Kingdom...I am trying to recall this part from memory and am not home right now to run up and look!! If I am wrong, please just post a note here to correct me *wink* The toppers are Real Red cardstock just scored and folded over.

The 'magic reindeer dust' is a very secret potion of oatmeal and glitter!! I just used the large gusset cello bags and cut down the tops to 6" and folded them over (basically because that is what I had on hand) I put about 3 heaping tablespoons of oatmeal into each bag with a few good shakes of glitter ~ I just used a combination of glitter as I made the bags -- they are all a bit different.

Incase the picture is too hard to read here is the saying:

Magic Reindeer Dust
On Christmas Eve when the moon is out,
Clap three times and stomp about.
Sprinkle the reindeer dust on the ground,
Shout Santa two times and turn around.
The sparkle of glitter and the smell of the oats
will guide Santa’s sleigh straight to your house!


I truly hope this finds you enjoying the magic of the holiday season!!

~TFL & Enjoy~

07 December 2006

Fun Frapp Attack


Here is my first attempt at the recycled Frapp containers!! Hardly no stamping involved in this project--boy does that seem different!!

I picked these yummy Mocha treats up last week (first time trying these too!! mmm!) and have been pondering what I would do with the bottles once they came out of the dishwasher---then I flipped the December calendar over and realized there were December birthdays!! So I quickly made these up tonight as a gift for my boss. His birthday is Friday but I wanted to take it into work on Thursday incase he takes Friday off!! I did stop at the store on my way to work tonight and pick up some goodies and filled each one with different kinds of candy he likes---M&M's, Jelly Beans, Hot Tamales & Maple Nut Goodies. --Of course I took the calories out of each and every one of them....lol!

I tried to make it a 'guyish' kind of gift---not too 'girlish' looking! I do have a few other birthdays this month and am going to repeat this same project again as these were soo fun to do! It took me about a hour and a half to do this one from start to finish and being the first one ever I figure that is not too bad. The other two this month are for girls so they will be more 'frills' so they will be fun too!!


Here is the list of 'ingredients' I used to create:
Stamps: Terrific Tags, Too Terrific Tags
Paper: Sentimental Journey Designer Series Paper
Stampin' Pad: Chocolate Chip
Accessories: 1 3/8" Circle Punch, Stitched Grosgrain Ribbon, Grosgrain Ribbons, Gold Cord, Word Window Punch


~Enjoy & TFL~

01 December 2006

Oldie' But A Goodie!


Welcome to December!!

This is one of my favorite Holiday cards from a few years ago...and with it being the 1st of December I thought I'd post it today being in the holiday spirit!!! *hummin' holiday tunes as I type this*

I stamped this one shortly after I signed up to become a SU! Demo and after I found SCS!! The inspiration comes from Karen Beiermann ~ ~ Thanks Karen!!

Funny how you look at things that you stamped a few years back and you think, 'if I were to do that again today this is what I would do different' ---- well I'd probably do a bit more with background stamps for sure!!! I'd have to say I have a few more (ok, alot more!) stamps today than I did back then too!! lol

As always, here is the recipe of ingredients:
Stamps: Holiday Woodcuts
Card Stock: YoYo Yellow, Real Red, Whisper White
Stampin' Pad: Basic Black,
Stampin' Write Markers: Real Red Stampin' Write Marker, YoYo Yellow Stampin' Write Marker, Going Gray Stampin' Write Marker
Accessories: Real Red eyelets, Gold Cord, Star Punch, 1/16" hole punch


I hope you enjoy your holiday season this year with your family and friends~


~Enjoy & TFL~

29 November 2006

So Saffron Hope


This was a really fast and easy card to put together! I wanted to try out the watercolor paper and Natural Beauty is one of my fave stamp sets!! The 'Hope' was easy enough to cut out and add to the side of the flower image ~ that adds a whole other dimension to the card I think.

I am totally into this paper distressing thing lately but I wanted to demo that you can still go back and do it with the bone folder for those that dont have the SU! cutter kit yet (my fave new tool right now!!) ----Just use your bone folder and rub it along the side of your paper like you were peeling a potato--whoola! How easy is that?!

So I thought this card could be used for any number of things----including support or sympathy.


As always, here the recipe of 'ingredients':

Stamp Sets: Natural Beauty & Floral Background
Card Stock: So Saffron, Certainly Celery, Watercolor Paper
Sampin' Pads: Stazon Black, So Saffron (for background and also for flowers)
Accessories: Gingham Ribbon, AquaPainter, Bone Folder (for distressing edges of CC cardstock)

~TFL & Enjoy~

28 November 2006

All my (customer) thanks to you


I have a workshop coming up tonight for a group of gals that get together with me about every month for a workshop. They are a super bunch of fun ladies to meet with and since it is almost December I am going to do a bit of a more detailed 'make-n-take' card with them as my present to them for another great SU! year. This will be our final project of the night. I wanted to show off the new Designer Label Punch and this is such a perfect card to do it. The tag says "All My Thanks to You" and that is exactly the way I feel to this group of gals! They are pretty experienced stampers so they should be able to get it done pretty quickly. I have everything cut and ready to go---they just need to stamp, distress, tie and assemble. They will also stamp a coordinating envelope and I will give them each one of the plastic card jackets that I was recently introduced to from a SCS'er friend! (I don't usually promote anything but SU! stuff at demos but these card jackets are really pretty cool!!)

Thank you SCS'er 'AmyR' for your total inspiration on this card!!! See her card here

As always, here are the 'ingredients' for this card:
Stamps: Seeing Spots, Designer Label, Dotted Background,
Card Stock: Whisper White, Chocolate Chip, Cool Caribbean, Marigold Morning
Stampin' Pads: Chocolate Chip, Cool Caribbean, Cranberry Crisp, Marigold Morning
Accessories: Grosgrain Ribbon, Cutter Kit (distressing tool) Designer Label Punch, Rectangle Punch

~TFL & Enjoy~

22 November 2006

Close As A Memory


Sympathy cards are always something that I like to keep on hand---not fun but it is one of the occassions that we face as we live life---death.

I don't stamp a verse on the inside until I am ready to sign and send it so it can be a bit more personalized but I think this card could work well either for a guy or gal.

I adapted the colors for this card from the SU! Ribbon Originals (page 234 of the current IB&C)--I just love this stuff!! Prep School color line is what I worked with here~ ~ ~

It's hard to see in the picture but the background of the flowers is actually stamped with the Linen BG using So Saffron to give it a very subtle but 'filled in' look. The flowers were colored on the rubbah' with the Mellow Moss and Bravo Burgundy stampin' write markers and then stamped on the card stock. The 'huffing' technique was used to do this --- many of you may be familar with this. The weathered background stamped on the bravo burgundy cardstock is stamped with Versa Mark---I didnt want it to be too dark as I wanted to stamp the Sympathy verse on the front too...but I wanted it to be just dark enough that you could still see it there. Results: Perfect!

The SU! Cutter Kit (distressing tool) is one of my fave new tools!! I have used it on soo many cards lately! On this card I used it aound the edges of the Sahara Sand and Very Vanilla card stock.

Here are the 'ingredients' to this card:
Stamps: Close as a Memory, Linen BG, Weathered BG
Cardstock: Mellow Moss, Bravo Burgundy, Not Quite Navy, Very Vanilla, Sahara Sand
Stampin' Pads: Bravo Burgundy, Not Quite Navy, So Saffron, Mellow Moss Stampin Write Marker, Bravo Burgundy Stampin Write Marker, Versa Mark Pad
Accessories: Cutter Kit (distressing tool), Ribbon Originals Prep School, Stampin' Dimensionals

~Enjoy & TFL~

21 November 2006

Tribute Totally 2 Taylor


Err... maybe the title should say "Totally Cased"???

Anywhoo....I am a huge fan of Taylor VanBruggen (Taylored Expressions). Like if she were a rock star I'd go to her concerts and have to sit in the front row kinda fan...get it? *wink wink* She is such an awesome stamper---her ideas continue to amaze me!! Like where does she come up with all of her wonderful awesome ideas? I'll just keep daily tabs on her blog for the pure amazement!!

So I totally fell in love with a card she posted on November 9th---wowzers!! She just 'whipped' it up...I didnt exactly do that but I got er' done! lol I didnt have all the supplies that Taylor had but I made due. I was also trying to only use SU! supplies as I am going to demo it at a workshop next week. I probably wouldnt demo such a detailed card at a workshop but this is a group of gals that get together with me pretty much on a monthly basis to do a SU! workshop so I think they will be ok with it as far as the degree of stamping goes. Most of them have all of the 'tools' it takes to make this card so I think they will be excited to see that they too can make it with the supplies and tools that they already have at home!

The pic may not show it very well but I double stamped the background with two background stamps---Linen and French Script--in that order both using More Mustard. Amazing that the FS comes across looking a bit darker in color even though it is the same color ink!! I sponged the Cool Caribbean cardstock with Chocolate Chip ink after using the white gel pen. I used the sponge dauber on the big flower to apply the cool caribbean colors as I can get a more precise application this way. I did this after stamping the middle More Mustard flower. Then I lightly sponged this whole image using the Chocolate Chip sponge.

One thing I thought of that could possibly change the whole look of the card would be to take the large flower and do the cracked glass technique on it---that would be very pretty but add more time to the card project.....

Here is the list of 'ingredients':

Stamps: Mixed Bouquet, French Script, Linen, Tiny Talk,
Card Stock: Chocolate Chip, Very Vanilla, More Mustard, Cool Caribbean
Stampin' Pads: Chocolate Chip, More Mustard, Cool Caribbean
Accessories: Cutter Kit (distressing tool), Mustard Grosgrain Ribbon, Copper Metal Edge Tag, Sponge, Sponge Dauber, White Gel Pen, Stampin' Dimensionals, Crafters Tool Kit, 1/16" Punch, Mini Glue Dots

~TFL & Enjoy~

16 November 2006

Like it a Latte --- Reformatted??


The air is starting to get chilly here and that that reminded me of this fun 'old' SU! set...

I just love the new stamp set in the SU! Winter Mini Catalog 'Like it a Latte'. Pictured here is a retired stamp set that I used to love and use alllll the time!

Humm.....I could totally see this same project reformatted using the new stamp set!!! Can't you??

"Nothing's better than a good friend with chocolate"

"Sending warm thoughts your way"

"I like it a latte"


Here are the 'ingredients' for the above pictured project:

Stamps: Espress Yourself
Paper: Creamy Caramel, Naturals Ivory
Ink: Creamy Caramel, Chocolate Chip, Real Red Stampin' Write Marker, Creamy Caramel Stampin' Write Marker
Accessories: Cello Bags, Circle Maker, Stamped Labels to go around the chocolate bars, Gold Brad, Deco Scissors


~Enjoy & TFL~

14 November 2006

Autumn thoughts & creations


This is getting wayyy off the rubbah' thoughts and creations but I guess it tis' my blog eh'? lol

My DH and I live out on Iowa family farmland on the edge of timber. We have no close neighbors to speak of. (ahh!!) This fall we went over to my parents place, only about 4 miles away, and brought home one of my Dad's old trucks from the grove -- I wanted to use it as a 'decoration' in our big yard---on the edge of the timber! In the spring and summer the truck bed will be a 'flower bed'! For now Mr. Scarecrow is occupying the drivers seat and the bed is full of hay bales and punkins'. Soon Santa will take the drivers seat and he will be hauling trees and gifts.

At night it is illuminated by a few spotlights on the outside as well as one on the inside of the cab ~~ it's been a fun addition to our acerage!

~TFL & Enjoy~

11 November 2006

Simple Plaid Noble Deer

Wow! Was this a quick one or what?! ---but how fun and masculine this will be to give to the guys deserving of cards!

I am just loving the flannel plaid background stamp---I've been using it on just about everything! Humm...wonder how that would work on the walls around the house?! lol

Anywhoo....that is just grosgrain ribbon wrapped around the two corners there and just taped to the back...how simple is that? Just a bit of embellishments but not enough to over do it on a guy card! *wink wink*

Special thanks to SCS'er 'jackgofoxy1' for her inspiration---yeah!!

Here are the ingredients to this card:
Stamps: Noble Deer, Flannel Plaid
Paper: Mellow Moss, Always Artichoke, Chocolate Chip, Confetti Cream
Ink: Mellow Moss, Always Artichoke, Confetti Cream
Accessories: Sponge, Grosgrain Ribbon

~Enjoy & TFL~

08 November 2006

Happy Holidays 2006


My Dad recently had knee replacement surgery. So while he was in surgery Mom and I sat in the family waiting room and made these cards! These will be their Christmas cards to send out this season. Mom was thrilled to have her cards done before they left the hospital this past week --- completed before Thanksgiving!

Special Thanks to SCS 'stamptramp72' for her inspiration for this card!! I appreciate you! Here is her card~

Here are the 'ingredients' used to complete this project:
Stamps: Flannel Plaid, Woodcut Holly Jumbo Wheel, Happy Everything
Card Stock: Always Artichoke, Kraft
Stampin' Pads: White Craft Pad, Always Artichoke Jumbo Cartridge, Handsome Hunter
Accessories: Cranberry Stitched Grosgrain Ribbon, Crystal Effects, Real Red Marker for berries, Heat Gun to set White Craft faster

~Enjoy & TFL~

07 November 2006

Riveting Revisited!


So I tried to go back and add a 2nd picture to my other post a few days ago---a better picture that is! lol Once again my computer illiteratices are shining through! I figured out where you can add a second picture--but it woud not show up even though it said it uploaded it and all. So anywhoo---for anyone that reads my blog--here are two more pictures that I think turned out quite a bit better the 2nd time around!

~Enjoy & TFL~

04 November 2006

Celebrating a la Carte

Happy Saturday to you!!

Pictured here is what kept me busy today in my stampin' space!

I prepared swaps for the upcoming SU! Winter Mini catalog. This was a fun card to do---all of the colors are from the "In Colors" SU! family and have been really fun to work with since they were released with the new catalog back in July.

What is a card swap you ask? Well it is a really fun (and addictive) way to collect card samples of all the stamp sets featured in the upcoming mini catalog without having to actually purchase all of the stamp sets to make all of the card samples myself! So for example, the upcoming mini had let's just say 16 different stamp sets or printed papers. So I made 16 of the same card front plus one extra for the hostess (the hostess gets one for the work she will do to sort them out and get them back to all of us in our pre paid packages). So when I get my package back, I will have 16 DIFFERENT cards to share with my customers showcasing the new Winter mini catalog. My investment was minimal compared to what it would have been if I were to have made all of the cards my self (let alone the time involved!) Clear as mud now? lol

Whew! Ok with that all being said, I signed up for the 'Leaves a la Carte Jumbo Wheel' spot but also wanted to use the 'Taggers Dozen' stamp set too cuz' I just lovveee anything tags --- so I tried to use them together on the same card design.

As I was coming up with a theme and a layout I thought this would make a great fall wedding card---great fall colors and it's seldom that I get wedding or anniversary card ideas through swaps. I hope the other swappers like it too!

Here are the ingredients to the card:

Stamp Sets: Leaves a la Carte Jumbo Wheel, Taggers Dozen, Linen BG, Wonderful Words
Card Stock: Marigold Morning, Vintage Violet, True Thyme, Cranberry Crisp
Stampin’ Pads: More Mustard Jumbo Cartridge, Vintage Violet, Cranberry Crisp
Accessories: Tag Punch, Small Tag Punch, 1/16” circle punch, Gold Narrow Organdy Ribbon, Gold Cord, Stampin’ Dimensionals, Cutter Kit (distressing tool), Stampin’ Around Wheel Guide

~Enjoy & TFL~

03 November 2006

Riveting!

Hello! I have been wanting to post the past few days but have had a little snag in the plan! I was out of town...but had my laptop...I had access to wireless internet access but I was unable to attach a picture to any posts here. Now don't ask my why this was as I am computer illiterate when it comes to stuff like this!! lol So, even though I am a few days behind the plan, here goes!

My Dad recently had a birthday AND knee replacement (thus the reason I was out of town for a few days). Pictured in the foreground is the birthday card I made for him. I wanted it to look 'masculine' and I wanted to use the "Riveting" SU! Hostess stamp set. I had seen a card posted on SCS by (kellykk) and I just loved the look of using different background stamp sets.

Here is a list of supplies I used:
Stamps: Linen BG, Print Pattern BG, Weathered BG, Canvas BG, Riveting (hostess)
Card Stock: Chocolate Chip, Always Artichoke, Creamy Caramel, Brushed Gold
Stampin Pads: Chocolate Chip, Always Artichoke

Accessories: Gold Embossing Powder, 1 3/8" & 1 1/4" Circle Punches, Chocolate Grosgrain Ribbon

The base of the card is Chocolate Chip cs and I stamped the entire front of the card using the Linen BG in chocolate chip ink.

Then I stamped the Print Pattern, Weathered and Canvas background stamps on Creamy Caramel cs using Always Artichoke ink. I cut these into 3 pieces of the same size and mounted them to a piece of Always Artichoke cs.

I wrapped a piece of Chocolate Grosgrain Ribbon around that piece and tied it with a knot (I can't do pretty bows so all are done in knots at my house!)

THEN I stamped the 'enjoy your day' stamp from the hostess Riveting stamp set in the top boss pad and stamped it on the brushed gold paper. I immediately sprinkled the Gold Embossing powder over it and heat set it using the heat gun. The result is an awesome gold on gold tone! Once it cooled, I used the 2 circle punches to punch it out! Then I just simply placed that behind the two tails of my knot---whoola! It's done!

Also, pictured in the same picture in the background inside the plastic card holder are thank you cards using the same design---just changing the riveting greeting to 'thanks so much'. I thought Dad could use the thank you cards to send out after his knee replacement for those that remembered him with their thoughts and prayers. So sorry the picture is soo dark. I wish I could get my pics to turn out so bright and pretty on line like others are able to achieve! I'll keep pluggin' away and tryin'!

~Enjoy & TFL~

28 October 2006

Boo 2 U!

I just finished these up earlier today and delivered them! There were a few more but I figured this would be enough for picture purposes! lol

I started out purchasing the quart sized paint cans & openers from Sherwin Williams. The clerk kinda looked at me strange when I asked to buy sooo many! lol

TIP: Something I learned while picking up the cans that I would love to share with you---the cans are cheaper to buy at Sherwin Williams than they are at Menards---this really surprised me too!

I used the Kraft wrapping paper that comes on a roll from any office supply store and cut enough for each can. Then I wheeled on the Jumbo Spooky Skyline from SU! with the basic black jumbo ink cartridge. Then I stamped the 'boo' using the 'Big Deal Alphabet' and the SU! white craft stampin' pad. I used a hot glue gun to adhere each strip of paper to the cans. I used blue grosgrain ribbon to wrap around each can and tied it tight. Then I attached a small piece of black grosgrain ribbon and a small piece of orange grosgrain ribbon to each side of the blue grosgrain tie made. The only orange tags were punched out using the SU! tag punch, and the design is stamped in basic black using the 'Tags so Much' hostess SU! stamp set. The little green galore name tags were punched out using the Small Oval punch from SU!. Both of the tags were punched with the 1/16' circle punch and tied around the grosgrain using the silver cord and this was just tied in with the grosgrain ribbons.

Now to the top of the can---- Because I was making sooo many I wanted to keep it relatively simple. I cut out Brilliant Blue circles with a circle maker and stamped the two images in basic black from the SU! Booglie Eyes stamp set. Then I just used the SU! liquid glue and SU! Dazzling Diamonds glitter on each of the cute little spiders. I attached it to the top of the can and called it complete.

I filled each can full of yummy candy treats that I purchased in the Halloween candy isle at the store! Mmm!

So each recipent could open their can I attached the can opener to the side of each can. I ran a longer piece of silver cord through the hole on each can opener and stuck the end of the cord under the lid before I closed them---this held the can opener in place and the longer cord will allow the recipent to have enough cord that they can open the can with the can opener....gosh that was alotta' cans in that sentence!! lol

Hopefully the recipents will enjoy opening their can of Halloween goodies! These would be great to stamp and decorate for birthdays or really any kind of celebration in your life!

~Enjoy & TFL~

26 October 2006

Ode to the outdoors(men)


This is one of my favorite cards to stamp and give for masculine birthdays! Even if they are not a hunter, they can relate to the 'outdoors' theme!

Every other image of the 'warmest wishes' is 'stamped off' for the lighter effect. I used a sponge paintbrush with the SU! Gold Encore re-inker to go around the edge of the warmest wishes part. I used the sponge dauber and Close to Cocoa to go around the deer image.

Note to self----The next card I stamp like this I am going to try the linen background in place of the canvas background and see how different it looks---Then I thought I would give the flannel background stamp a try as well---I think that would look good too! I am using the flannel background on lots of cards lately--the thing I think I love about it is that when stamped it is not to look perfect---holes here and there---you know the 'worn' feeling!!

Here is my recipe:
Stamps: Noble Deer, Canvas Background, All-Year Cheer I
Card Stock:Confetti Cream, Basic Black, Close to Cocoa
Ink: Basic Black, Close to Cocoa, Copper Encore, Gold Encore
Accessories: Grosgrain Ribbon, Sponge Dauber, Sponge paintbrush, The Tearing Edge

~Enjoy & TFL~

25 October 2006

~ Fall Is In The Air ~

I've been busy the past few days working on Halloween stampin' projects ---cards, cello bag toppers and paint cans (along with the general tasks in everyday life too -- including prep for an audit that is this Friday morning for the apartments we manage---I am a firm believer that stamping is a stress outlet for me!! I will be sooo glad when Friday afternoon rolls around!) But anywhoo, I thought I would post a card tonight that is one of my all time favorites! I am not sure if it is because it is fall, and that *is* my favorite season but I just love the colors and the 'faux metal' technique. The technique, and card layout for that matter, came right from my favorite source of stampin' inspiration---SCS!

Here is the Faux Metal Technique tutorial.

My copper leaf here is the faux metal in this example. And if I can do it---anyone can do it!! Give it a try ~~ it's bunches of fun!! I demo'd this for a favorite stampin' group of mine last year --- I held a little 'customer appreciation' day for them and I tried to show them techniques that I wouldnt normally cover during a week night demo due to time restrictions (and its a tad bit messy and I have a huge fear I would spill the copper embossing powder ALL over their floors! *eek*)

Here is my recipe----
Stamps: Shapes & Shadows, Linen Background
Card Stock: All from the Color Coach; Bravo Burgundy, Handsome Hunter, Mellow Moss, Basic Black (for the faux metal leaf)
Ink: Handsome Hunter, VersaMark
Accessories: Copper Embossing Powder, Sponge, Gold Wide Organdy Ribbon, Burgundy Grosgrain Ribbon, Copper Cord

~Enjoy & TFL~

20 October 2006

Hostess Gifts


Happy TGIF 2U!!

Ever since SCS posted the tutorial for the Acrylic Post It Note Holders I have had fun making these for different little gifts. ---Have I mentioned yet how much I love the SCS website?! lol

I try to do a bit extra for my hostesses because I appreciate them soo! For this (catalog) year I decided they would each get one of these. (styles will vary but I think I will go with the same theme)...I will incorporate their Name initial...to personalize it a bit. So, for instance, the demo I did the other night (sorry no pic!) I incorporated a stamped "S" as my hostess name was Sharon. I used the SU! Four Seasons printed paper pack--the blue snowflake theme for hers. I present them to the hostess at the beginning of the demo and quickly explain how to make them, offering them more detailed directions later if they wish. Sharon thought she would make a few for upcoming Holiday gifts.

Here is the 'recipe' of ingredients used to complete the pictured acrylic holder:

Stamps: Natural Beauty, Linen Background, Print Pattern Background, French Script Background, Small Script,
Paper: Certainly Celery, Night of Navy, Bashful Blue, Confetti Cream
Ink: Night of Navy, Night of Navy re-inker, Certainly Celery,
Accessories: Aqua Painter, Grosgrain Ribbons

~Enjoy & TFL~

19 October 2006

Colored with Linen

Good Morning!! Have you ever stamped a card at home, all by yourself in your stampin' space just you and your stampin' stuff, and it turns out great the first time? SURE!! We all have! THEN have you tried to go duplicate that same card in front of a group of others and it just does not turn out as well as you had hoped? Well....that happened to me last night! I wanted to demo the "Thouroughly Thankful" stamp set -- stressing to the Ladies that you dont need to color it all in, saving time. Sooo I stamp the large TT image on the SU! Natural Ivory card stock --that turned out fine! Then I went to stamp my Linen BG on top of that using more mustard --- uh! I ended up with a big hole where the linen BG didnt get pressed against the cs --- near the leaf image (just to the left of the flower image where the brad is placed in this picture). Sooo trying to think quickly on my feet I just took my aqua painter and dabbed it in the Old Olive stampin pad lid and just colored that ONE leaf in---whoola! Big hole problem solved (and quickly at that!) Believe it or not---the hostess chose that card over this one!! How funny is that---a mistake that turns out to be OK! So I also stamped another and on purpose just colored in the pumpkins--just one image---that is a cool look too!! I used the new distressing tool around the Naturals Ivory cs to give it a different look---that is one fun tool to use!!!

Here is the 'recipe':
Stamps: Throughly Thankful, Linen Background
Paper: More Mustard, Close to Cocoa, Naturals Ivory
Ink: Old Olive, Chocolate Chip, More Mustard
Accessories: RR Brads, 1/16" punch, Stampin' Dimensionals, Vintage Violet Grosgrain Stitched Ribbon, Cutter Kit (distressing tool -- for around the large image)

~Enjoy & TFL~

18 October 2006

Make MERRY


Hello Everyone!! I apologize for taking sooo long to post!! Life has been busy and I have been trying to get this blogging stuff all figured out! LOL! So bear with me here---I have alot to learn yet!! Any tips and tricks from you would be welcomed and appreciated!!

This is a card that I completed in August for a card front swap that I participated in on SCS (I love that place!)

This card features the "Jolly Trees" Stampin' Around wheel on page 12 of the Stampin' UP! Holiday Mini Catalog. I am a huge fan of the Color Coach and chose my color scheme from that. I stamped the Weathered Background Stamp on the Night of Navy cardstock with VersaMark--just enough to give it a little background effect. I wheeled the trees on with the Stampin' Around Wheel Guide. (The wheel guide is a quick tool used to keep the stamped line straight across my cardstock.) I then tore the bottom of the Garden Green cardstock with the The Tearing Edge--boy is that a quick and fun (and sharp!) Also, because I lovvvveee anything tags I had to use my favorite punch---the Tag Punch! I used the Hostess 'Tags So Much' stamp set that is designed to work with this punch! I put a stampin' dimensional under the tag just to pop it up off the card front a bit too. What ya' think about the new stitched grosgrain ribbons SU! has released? I am lovin' em'! I wanted to include one in this project so I chose Cranberry Crisp. I also added a smigen of the Gold Cord just for a festive holiday touch. The "For You" (from 'Happy Everything') sentiment is stamped in Craft White.

It is a pretty plain looking card but when making as many as I did, I felt I had to keep them pretty simple and duplicateable (is that even a word?lol)

~Enjoy & TFL~

28 September 2006

Proudly cased from Sista Mike


How fun! I received the pink card on the right from Sista Mike SCS: missmike and this gave me the inspiration to try one myself! So on the left is the one that I cased - 'frumpy frog' ;o)

It's a normal sized card but then you just cut the funky shape using the personal trimmer and making one cut at an angle!!

Here is my list of ingredients:

Stamps: Birthday Banter, Canvas Background
Paper: Green Galore, Gable Green, Basic Black, Confetti White
Ink: Basic Black, Green Galore,------ Stampin’ Write Markers: Real Red, YoYo Yellow, Green Galore
Accessories: Gingham Ribbon

Thanks again Sista' for your creative and awesome inspiration!
~Enjoy & TFL~

25 September 2006

Girlfriends Card

Sorry this image came out a little blurry!!

This was another card I created for a summer swap ;o)

Here is a list of ingredients:

Stamps: Edgy Eloquence, Jumbo Basics Outline Wheel, Weathered Background,
Paper: From the Color Coach: Ballet Blue, Real Red, Pumpkin Pie, Creamy Caramel
Ink: Ballet Blue, Always Artichoke, Real Red Jumbo Cartridge
Accessories: Olive Ribbon, Gold Cord, Stampin' Dimensionals, Bone Folder (for distressing paper)

~Enjoy & TFL~

20 September 2006

B a good 1

This is a card front I made for a Summer swap that I participated in --

A Swap defined: A swap is a group you participate in where you make bunches of the same card - send them to the hostess and you get back a pkg full of all different card fronts to show off to customers/family/friends! It's such an awesome way to get soo many different samples without having to buy each and every stamp set in the catalog and make them yourself! I love swapping!!

Here are the list of ingredients I used on this card:
Stamps: Edgy Eloquence, Jumbo Buds Outline Wheel, Jumbo Buds Wheel, Canvas Background Paper: From the Color Coach: More Mustard, Close to Cocoa, Old Olive, Sahara Sand
Ink: Old Olive, Versa Mark, Stampin' Jumbo Wheels: Old Olive, More Mustard, Ballet Blue
Accessories: Stampin' Dimensionals, Navy Grosgrain, Copper Cord
~Enjoy & TFL~

15 September 2006

For You Friend

I participated in a hostess swap with this card ~ What fun new stamps!!!

Stamps: Flowers for a Friend, Tiny Talk
Paper: Almost Amethyst, Mellow Moss, So Saffron, Confetti White
Ink: Almost Amethyst, Rose Red, Regal Rose, Mellow Moss, Always Artichoke
Accessories: Bone Folder (to distress paper) Stampin' Dimensionals, Silver Grosgrain, Silver Cord
~Enjoy & TFL~

07 September 2006

Here we go!!

Soooo *taking a deep breath now* I have decided to try out this blog thing and start one of my own! I have enjoyed looking at other bloggers spaces so I thought, 'why not?' I absolutely love to get creative in my craft space with my rubber stamps ...

So here goes.....